About Me

My name is Myia and I am a mom to two wonderful girls. We love to explore life through sensory/messy play and nature. I strongly believe that you need to let children "be little" to reach their full potential. We encourage mess and exploring to build our little one up. We learn through a mixture of Reggio/Waldrof/Montessori practices. Follow for ideas and experiences in sensory play as well as our attachment parent journey!

Wednesday, September 30, 2015

Shaving Cream Art


 This is a simple, easy, and  easy to clean up activity. From 18 months and on, developmentally motor skills are soaring. Tegan has been perfecting her use of pipets over this time period. Water color activities help strengthen her dexterity and focus!

This is a two part activity: first we set up primary water color (using liquid water colors diluted in water) to "paint" a scene into the shaving cream set in a container.


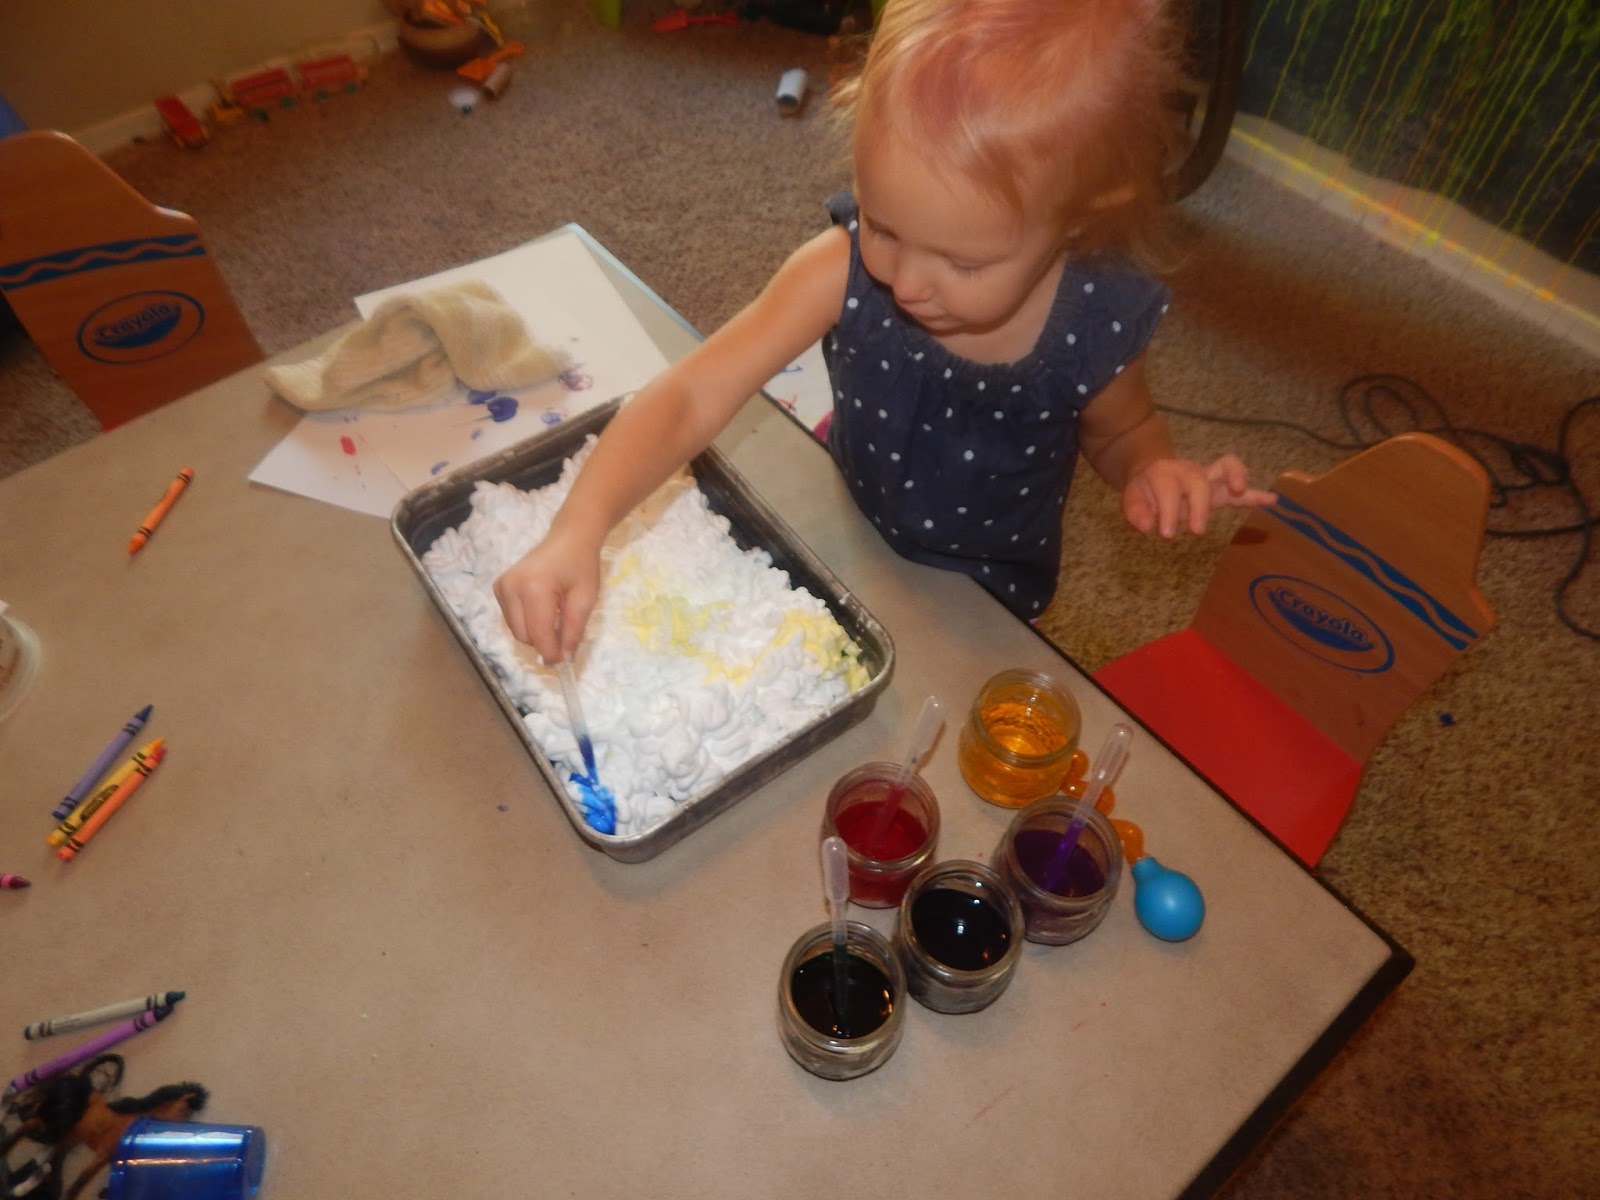
Droppers are perfect for this "painting," as you can see Tegan has a Learning Resources dropper (The bigger one, which is easier to hold and squeeze), and more adult droppers that require more skill. The Learning Resources droppers are great for beginners and as they improve their skills you can move on. If you child is having difficulty using the droppers, I suggest putting a tiny amount of colors into small containers and letting them "dump" the colors onto the cream.


This was also our first time using liquid watercolor concentrate instead of food coloring or washable markers for "diy" watercolor. I am impressed! The colors were much more vibrant, and no staining of the hands!


Now after they finish, you simply take a thicker piece of paper and put it on top of the cream. You have to squish it down and move a bit. I then "scrape" the cream off using the side of the pan.

Here are our prints!


Afterwards, I put water beads into the shaving cream because it is one of the most interesting tactile activities! So really, we go three types of play out of this activity, using a $1 can of shaving cream!


Friday, September 25, 2015

Sudsy Goop

Here in Arizona, it can simply be too hot to play outside. Even at 7am, it can already be in the 90's. However, I try to encourage Tegan to get out even if it is a little bit and she happily obligates, especially if water fun is involved.

Sudsy Goop is a fun activity using only four ingredients, cornstarch, kool aid, soap, and water. I used a bottle of dollar store baby shampoo for this particular time. Kool aid is for color and smell.

When you add water slowly to cornstarch, it creates a slime that can be solid in your fist and then "melts." Adding soap makes the goop a little more runny, and when you swish it dissolves and creates long lasting bubbles.


The best part is I love it when Tegan "Decorates" our patio. Kool aid and Cornstarch is a easy way to make chalk! So when she poured/flung the goop, it will actually dry like chalk.


I have left it out all day, and she has come back to it several times


This is from this afternoon:


It was easy, cheap, and a really fun activity that cleaned up well. And I am loving the dried art created from it! 


Thursday, September 24, 2015

Exploring Oil and Paint

We did this activity a few days ago, but I promised myself I would start updating my blog again! So I want to review one of our favorite activities from this week.

I like to allow art everyday; I keep supplies always open and available to Tegan. Let art happen naturally through drawing and paint. Sometimes since she is so young (2) she does need invitations to create and encouragement from myself as well.

I decided to take a little guidance with our art this day by exploring density. While she was too young to understand ( I think, you never know!) I explained that the oil in the bag was reacting to the tempura paint differently because the liquids were different in density.

We simply used one bottle of canola oil (use different oils, such as coconut, baby oil, ect for more experimenting!)

Tempura paints

2 ziplock bags-You might want to add tape to the top if you have a especially strong toddler.


We first poked, prodded, and squished the bags. Then Tegan took to vigorously shaking them! What was interesting is the lighter color bag mixed differently than the darker colors. For older children it would be a interesting lesson to research on why!


I ended up not being able to take photos, but we then poured the oil and paint into containers and panting with them. The oil saturated our plain paper pretty badly, next time I will use card stock so we can keep our creations!

We continued our "Oil" lesson with density by combining baby oil, glitter, and ice. The oil and glitter create and amazing glistening look while getting the ice "Slick." As the ice melts, the density of the water and oil repel each other, and the glitter stayed with the oil. Fascinating! We made ours into a "arctic" scene.


One of the biggest benefits of this lesson was to really use a different texture of oil. We have not done too many art or bin activities with oil. I am really interested in using oil and water beads in our next "oil" activity! Stayed tune for updates :)